Navigating the Interface: General Overview
Once you have successfully logged in, you will see an overview of your assigned projects.
You may then select the project you wish to work on and open it with one of the NINA tools :
In the case of a dubbing project, you will use NINA Dubbing and potentially NINA Subtitling to manage Forced Narrative elements. The NINA Prompting tool is reserved exclusively for studio recording sessions. |
|

You have the possibility to work in individual or collaborative mode, in the case of a project assigned to multiple people, a detector and an author, for example. |
|

1. Main Interface Elements
The interface of NINA Dubbing is made up of five distinct zones.
Detailed guides for each zone can be found in their dedicated sub-articles.
Click on the specific elements listed below to be redirected to their specific documentation.

2 - The video and playback options
3 - The work space and the rhythmo band tracks
4 - The role list where characters are listed via filters
5 - The dynamic script of the project that allows you to see the original version detection and adaptation texts, as well as loops
2. Personalizing the work space
You have several tools including a horizontal splitter at the internal edge of your video window, with which you may zoom according to the desired size.
Video options: You have a tool bar linked to the video player which you may choose to display or not by going to the general menu > Display and checking Player controls. |
|

Tracks space options: You may also activate an option that will allow you to better view the role and text lists and reduce the display of your rhythmo band space. |
|

The role list: You may choose to hide or to display the role list by clicking on the arrow at the bottom left of the section. However, it is strongly advised to permanently display it. |
|

The dynamic script: You may choose to display the dynamic script to the left or right of the video by clicking on the icons at the top right of the text section. |
|

You may also choose not to display it by going to the general menu > Display and by unchecking Display texts
You may choose to ignore this display by going to the right of the rhythmo-band tool bar and activating Toggle Widescreen. |
|
3. Adjusting Display Elements & Zooms
Video display | Display>Display preferences>Display Video Player |
Text tab display (detection, adaptation and loop) | Display>Display preferences>Display Texts |
Disable audio during frame-by-frame navigation | Options>User Preferences>Audio playback Uncheck the box Enable frame by frame playback sound |
Disabling video player buttons: This will allow for a larger video display. | Display>Player control Uncheck the box |
Adjusting the text size: The recommended size is 20 but you may modify this for improved viewing, it will have a direct impact on the height of your tracks. | Options>User>Preferences>Font>BelleAllureCM>20 |
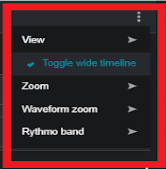
Defining the elements you wish to display: The recommended display is Rhythmo and Audio if you wish to see the Wav form. You may also click on only Subtitles if you wish to see Forced narrative elements that have been detected, and on Comments to write information you wish to communicate with the set. | Display>Display preferences>Timeline>View> Rythmo OR using the three dots at the top right of the rhythmo space>View> click on the desired options |
Defining the Timeline zoom: This setting regards the stretch of the text on the band. The recommended zoom is x8, x10, or x12 according to the size of your screen. | Display>Display preferences>Timeline>Zoom>x16 OR using the three dots at the top right of the rhythmo space >Zoom> x8, x10, ou x12 |
Defining the Wav form zoom If you wish to display the Wav form. The recommended zoom is x5. | Display>Display preferences>Timeline>Wavform Zoom>x5 OR using the three dots at the top right of the rhythmo space >WavformZoom>x5 |
4. Configuring the autosave of a project
Your projects are automatically autosaved as often as you choose. You must configure the autosave function of your tool in the general menu, in Options > User preferences. As a precaution, it is recommended to save (Ctrl+S) one last time before closing a project. |
|
